
Best Shells Tier List
By Iron Nest Wiki Team · August 2026 · 10 min read
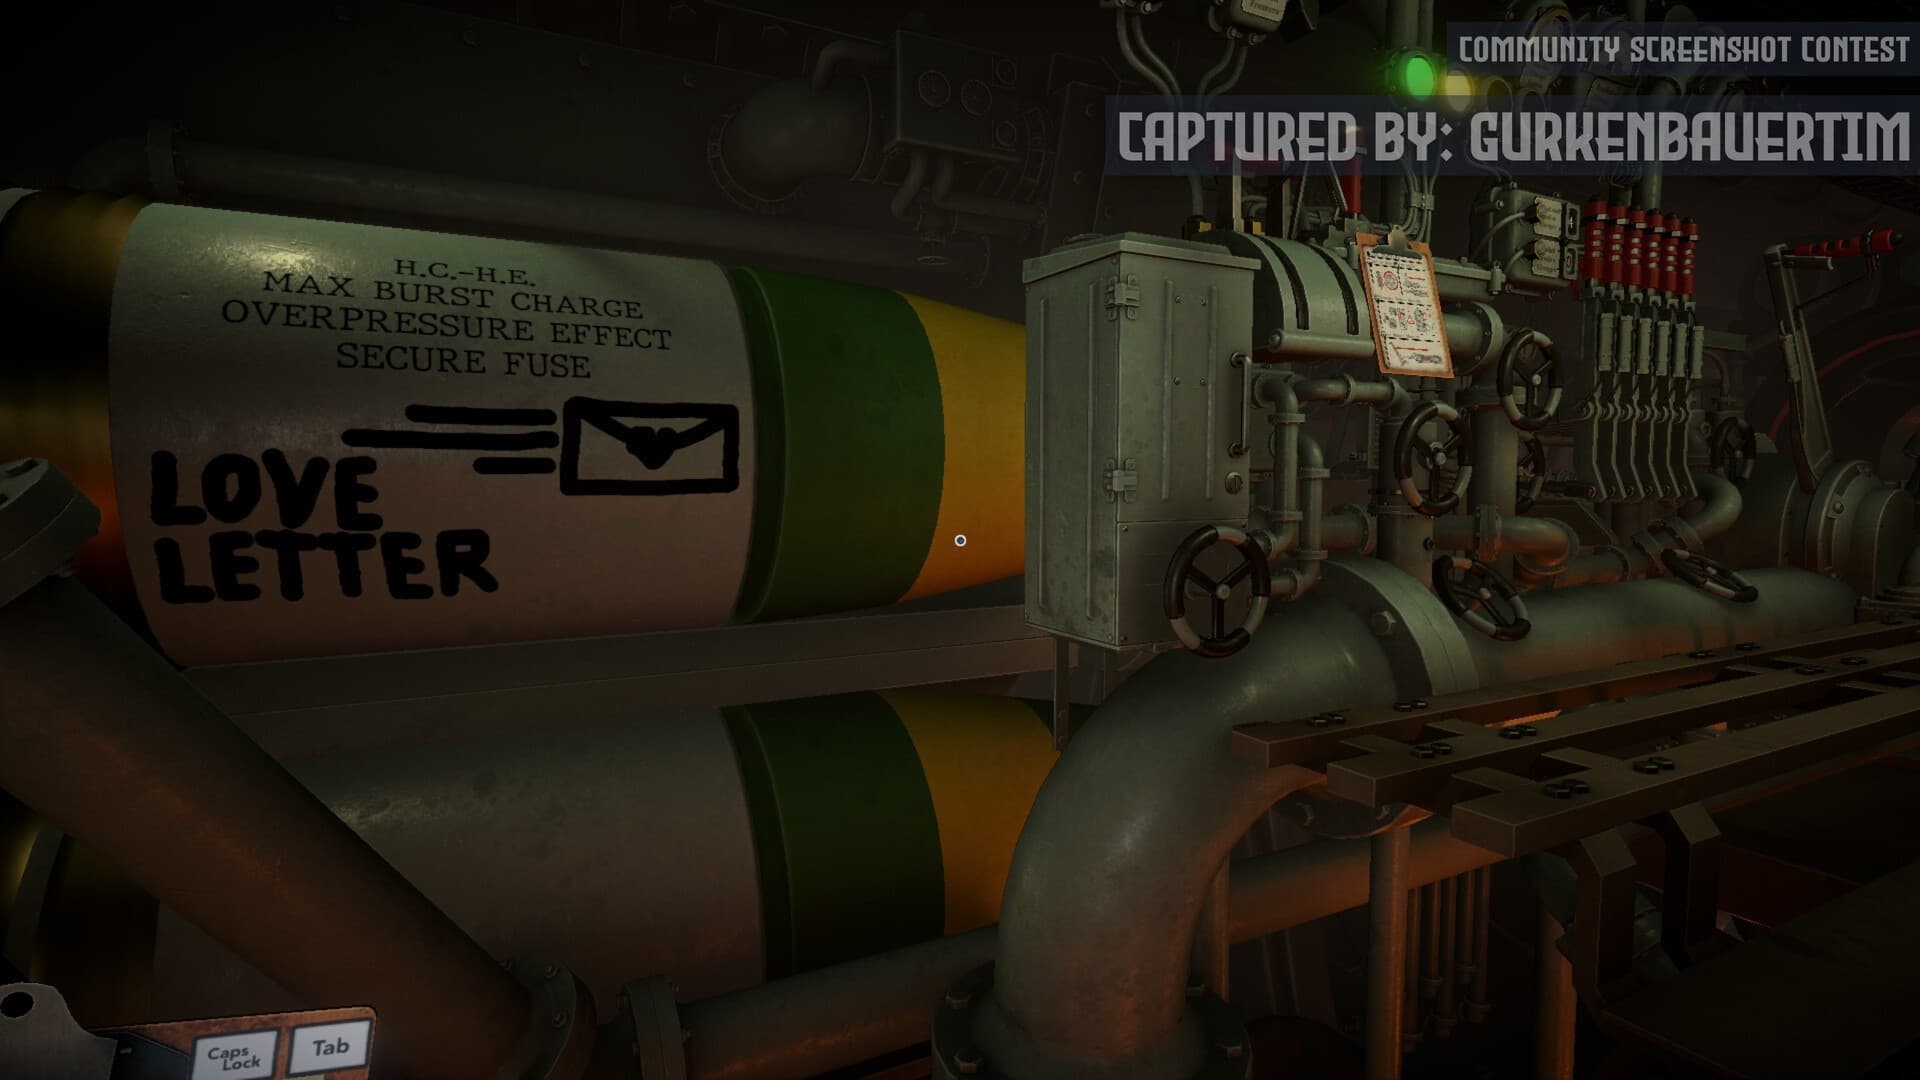
Picking the right shell inside a 5,000-ton quadrupedal turret changes whether a salvo lands on target or wastes three powder charges into the dirt.IRON NEST: Heavy Turret Simulator features a diverse arsenal of ammunition types, each designed for specific tactical scenarios. This tier list ranks every shell type by weighted aggregate score across damage output, versatility, reliability under time pressure, powder charge flexibility, and tactical utility.
The game's core loop is a six-step firing cycle: intelligence, plotting, calculating, loading, aiming, and firing. The “loading” stage is where shell choice matters most, because each shell type interacts differently with the Ballistic Calculator, the powder charges stacked behind the breech, and the target classification printed on the Teleprinter. Understanding when to load AP versus HE, or when chemical rounds outperform both, is the difference between mission success and wasted requisition.
How Shells Are Ranked
This tier list evaluates shells across five criteria:
- Damage per salvo: Raw destructive power against the intended target type
- Versatility across target types: How many different mission profiles the shell handles well
- Reliability under time pressure: Performance when the Teleprinter spits coordinates under a live Counter-Battery Timer
- Powder charge flexibility: Shells that perform well across charges 3-5 score higher than charge-6 specialists
- Tactical utility: Secondary effects like smoke, fire, gas, or armor penetration
Note: Damage output alone does not determine tier ranking. A shell that delivers massive damage but only works on one target type scores lower than a shell that handles 70% of objectives acceptably, because most campaign missions swap target profiles every two minutes.
Tier S: Meta-Defining Shells
These are the rounds experienced gun crews reach for first. They carry missions that lower-tier shells cannot. If a crew only ever loads one type of shell, it should be from this tier.
APCR (Armor-Piercing Composite Rigid)
Tier: S | Best Charge: 5 | Reload Penalty: +1.5s
APCR sits at the absolute top of every tier list because it punches through hardened targets that bounce standard AP rounds off reinforced concrete. The tungsten-carbide core ignores angled armor plating above 60°, making it essential during the “Iron Crossing” campaign mission where armored trains circle the firing window every 90 seconds. Standard AP deflects off sloped train turret plating roughly half the time; APCR does not.
- Penetrates up to three layers of bunker wall at powder charge 4
- Ignores angled armor above 60° — critical for armored trains and sloped bunkers
- Flatter flight path with more predictable wind drift than HE
- Best paired with charge 5 for maximum penetration on fortified targets
- Reserve charge 6 for shots beyond 8 km where muzzle velocity matters most
The reload penalty is real — about 1.5 seconds longer than standard AP — but the trade-off is worth it when a single hit destroys what would otherwise require two or three standard AP rounds. Unlock APCR as a rare drop from elite mission rewards after completing the early campaign.
HE-Frag (High-Explosive Fragmentation)
Tier: S | Best Charge: 3 | Reload Penalty: +0.8s
HE-Frag is the beginner-friendly workhorse that veterans still rely on. The 12-meter blast radius forgives elevation errors that would miss with AP, and the secondary cone of shrapnel catches troops fleeing the blast zone while damaging light vehicles parked just outside the primary radius. When the Tactical Map shows clustered infantry or soft-skin vehicles, HE-Frag clears more targets per salvo than any other round in the game.
- 12-meter blast radius — most forgiving shell for elevation errors
- Secondary shrapnel cone catches fleeing troops and light vehicles
- At charge 3, can suppress an entire ridge of rifle pits if landed within 8 meters of the centroid
- Charge 5 covers more ground but leaves less margin for elevation error
- Best starter shell for learning the Ballistic Calculator and firing cycle
The trade-off is penetration depth: HE shells lose roughly 40% effectiveness against reinforced positions. The standard doctrine for mixed-target salvos is pairing HE with AP during mid-campaign missions. Stockpile HE-Frag for the first wave of every engagement.
AP (Standard Armor-Piercing)
Tier: S | Best Charge: 4 | Reload Penalty: +1.0s
Standard AP is the reliable middle-ground option. It penetrates underground targets and fortified bunkers, though not as reliably as APCR against angled armor. Available from Mission 3, it becomes the backbone of most operators' loadouts before APCR is unlocked. For gun crews learning the Ballistic Calculator, AP shells reward precise elevation because their flight path is flatter and wind drift is more predictable than HE.
- Penetrates ground before detonating — effective against underground targets
- Flatter trajectory than HE, more predictable in wind
- 0.06 km blast radius (smaller than HE, but sufficient for precision targets)
- 10 requisition points per shell
- Best general-purpose shell before APCR is unlocked
Tier A: Specialized Workhorses
These shells won't dominate every mission, but they outperform S-tier rounds in narrow situations. You'll encounter them mid-campaign when the difficulty curve steepens and objectives stop rewarding generic HE spam.
Chemical Shells (Phosgene/Chlorine)
Tier: A | Best Charge: 2-3 | Reload Penalty: +1.2s
Chemical shells deliver phosgene and chlorine payloads that linger in trenches, bunkers, and tunnel mouths for up to 45 seconds after impact. The damage-over-time effect is invisible to enemies wearing gas masks in early waves, but masks break under sustained bombardment. Two chemical shells plotted on the same tunnel mouth wipe out dug-in crews that would otherwise require five HE rounds to suppress.
- Lingering gas cloud damages over 45 seconds — outperforms HE in enclosed spaces
- Gas masks break under sustained chemical bombardment
- Best for tunnels, trenches, mine shafts, and enclosed fortifications
- Wind drift: clouds travel 20-30 meters downwind after detonation
- Underperforms when wind speed exceeds 12 knots (Ballistic Calculator flags yellow warning)
Pair chemical shells with powder charge 2 or 3 for short-range gas barrages inside enclosed spaces. Reserve higher charges for distant mine shafts where the cloud needs extra velocity to reach the target before dissipating. Unlocked at Mission 6 alongside incendiary rounds.
Incendiary Rounds (INCN)
Tier: A | Best Charge: 3 | Reload Penalty: +1.0s
Incendiary shells ignite fuel stores, ammo dumps, and wooden fortifications on contact, then sustain a fire damage-over-time effect for 20 seconds. They're the most situational shell in the game because they only outperform HE on flammable objectives, and underperform against stone, steel, or packed earth. However, when the objective marker reads “fuel depot,” “supply cache,” or “munitions bunker,” incendiary rounds complete objectives in a single shot that would otherwise require three HE salvos, because the burning effect chains into secondary explosions.
- Ignites fuel and ammo caches on contact
- Fire DOT chains into secondary explosions on flammable targets
- Provides visual confirmation marker for follow-up shot adjustment
- Zero damage per second against stone, steel, or packed earth
- 12 requisition points per shell
Reserve incendiary rounds for missions where the briefing explicitly names a flammable target. Don't waste them on fortified bunkers. Unlocked at Mission 6.
Tier B: Niche Picks and Calibration Rounds
These shells rarely lead a tier list, but they fill gaps that S- and A-tier shells can't cover. They round out any honest loadout that wants to cover the full loader's bench.
Shrapnel Shells
Tier: B | Best Charge: 4 | Reload Penalty: +1.4s
Shrapnel shells are airburst rounds that detonate 5 to 15 meters above the target, scattering steel balls across a 30-meter cone that shreds open-field troop formations. They're devastating against rifle companies advancing across flat ground, but useless against fortified positions where the airburst triggers above the bunker roof and wastes the payload on empty sky.
- 30-meter cone spread — devastating against open-field troop formations
- Requires manual time-fuse setting (high skill ceiling)
- Airburst visible as flash — helps confirm range at night
- Loses 60% effective coverage in city maps where buildings block the cone
- Unlocked at Mission 9
Use shrapnel only for open-field advances where troops cluster in march formation, and nighttime missions where the airburst flash helps confirm range. Avoid in urban environments. The high skill ceiling makes this a specialist's round.
Calibration Rounds
Tier: B | Best Charge: 2 | Reload Penalty: +0.5s
Calibration rounds aren't combat ammunition — they're smoke-traced practice shells used during zeroing drills before live fire missions. They appear in the loader's hands during the first three campaign missions and during the “Calibration Fire” challenge mode, which rewards consistent first-round hits with bonus score multipliers. While they don't rank in combat tier lists, mastering calibration shots is the fastest path to consistent live-fire accuracy.
- Smoke-traced practice shells for zeroing drills
- Appears in first three campaign missions and Calibration Fire challenge mode
- Rewards consistent first-round hits with score multipliers
- Experienced crews fire 2-3 calibration rounds before switching to live ammunition on long-range targets beyond 10 km
Shell Effectiveness by Target Type
Shell selection changes based on what the Teleprinter prints and what the Tactical Map shows. Here's the decision flow veteran crews use:
Step 1: Check Target Classification
- “Armored,” “bunker,” or “fortified” → Load AP or APCR
- “Infantry,” “convoy,” or “soft skin” → Load HE-Frag
- “Trenches,” “tunnel,” or “dug-in” → Switch to chemical shells
- “Fuel,” “cache,” or “depot” → Incendiary is the right call
- “Formation” or “advancing” → Shrapnel covers open-field troops
Step 2: Confirm Range Band
- Under 4 km: Favors HE-Frag and chemical shells (lower charges keep loader cycle fast)
- 4-8 km: Favors standard AP and incendiary (charge 3 or 4 hits the sweet spot)
- Over 8 km: Favors APCR with charge 5 or 6 (muzzle velocity preserves accuracy)
Step 3: Scan Environmental Modifiers
- Fuel, ammo, or wood markers favor incendiary rounds even when primary target is armored (chain explosions clear compounds)
- Tunnels, trenches, or mine shafts favor chemical shells regardless of printed classification (enclosed spaces amplify gas)
- Chemical shells drift 20-30 meters downwind — adjust windage before plotting
- AP and HE drift less than 5 meters at standard charge
Complete Shell Comparison Table
| Shell | Tier | Best Charge | Primary Use | Blast Radius | Requisition Cost |
|---|---|---|---|---|---|
| APCR | S | 5 | Armored trains, angled bunkers | 0.06 km | Rare drop |
| HE-Frag | S | 3 | Infantry, light vehicles | 0.25 km + shrapnel cone | 10 |
| AP (Standard) | S | 4 | Mixed fortified targets | 0.06 km | 10 |
| Chemical | A | 2-3 | Trenches, tunnels, enclosed spaces | Gas cloud (20-30m drift) | Unlock Mission 6 |
| Incendiary | A | 3 | Fuel, wood, caches | 0.25 km + fire DOT | 12 |
| Shrapnel | B | 4 | Open-field troop formations | 30m cone (airburst) | Unlock Mission 9 |
| Calibration | B | 2 | Zeroing drills | Smoke trace | Practice only |
Unlock Progression
Shell types unlock through campaign progression:
- Mission 1: HE (High Explosive) — your starting shell
- Mission 3: AP (Armor-Piercing) — penetration for fortified targets
- Mission 6: Chemical and Incendiary — specialized payloads
- Mission 9: Shrapnel — airburst anti-personnel
- Elite missions: APCR — rare drop from high-difficulty rewards
Demo players currently have access to a limited shell set. Full campaign progression unlocks the complete arsenal.
Frequently Asked Questions
What is the best shell for beginners?
HE-Frag is the best starter shell because its 12-meter blast radius forgives elevation errors and damages both infantry and light vehicles in a single shot. It helps new crews land hits while learning the Ballistic Calculator and the six-step firing cycle during early campaign missions.
Are APCR shells worth their higher reload penalty?
Yes. APCR's 1.5-second reload penalty is offset by its tungsten-carbide core that penetrates armored trains and angled bunkers that standard AP bounces off. In late-campaign missions where armored targets dominate, standard AP fails more than half the time against sloped plating. APCR is essential, not optional.
When should I use chemical shells over HE?
Use chemical shells when the objective is a tunnel, trench, or enclosed fortification where troops shelter from blast but not from lingering gas. Two chemical rounds on the same tunnel mouth outperform five HE rounds because the gas keeps chewing through hit points after the loader has rammed the next round. Avoid chemical in high winds (above 12 knots) where the cloud drifts off target.
Do incendiary shells stack with other fire sources?
Yes. Incendiary shells ignite fuel and ammo caches that explode on a delay, which can chain-detonate nearby objectives. One well-placed incendiary round on a fuel cache can wipe out an entire supply yard in a single fireball. However, incendiary deals zero damage per second against stone, steel, or packed earth — never use it on non-flammable targets.
How do I unlock more shell types?
Shell types unlock through campaign progression as listed above. APCR is the exception — it drops as a rare reward from elite missions. Your mileage may vary by platform, and demo players currently only have access to the early shell set (HE and AP).
Should I always load the highest-tier shell?
No. The “best” shell is the one that matches your target type and mission profile. Loading APCR against infantry clusters wastes its penetration and reloads slower than HE-Frag would. Conversely, loading HE-Frag against an armored train wastes the shot entirely. Match the shell to the target, not the tier to your ego.